Getting a new iPhone is exciting, but before you can start making calls, sending messages, or browsing the web, you need to activate your SIM. Whether you're setting up your device for the first time, switching carriers, or upgrading to a newer model, understanding how to activate iPhone SIM is essential. This comprehensive guide walks you through every method available in 2026, from traditional physical SIM cards to cutting-edge eSIM technology that's revolutionising mobile connectivity.
Understanding Your iPhone SIM Options
The landscape of iPhone connectivity has evolved dramatically over the past few years. Modern iPhones support multiple SIM technologies, each with distinct advantages and activation processes.
Physical SIM Cards vs eSIM Technology
Traditional physical SIM cards are small, removable chips that slot into your iPhone. They've been the standard for decades, but they're gradually being phased out. Physical SIMs require manual insertion and can be swapped between devices, making them familiar to most users.
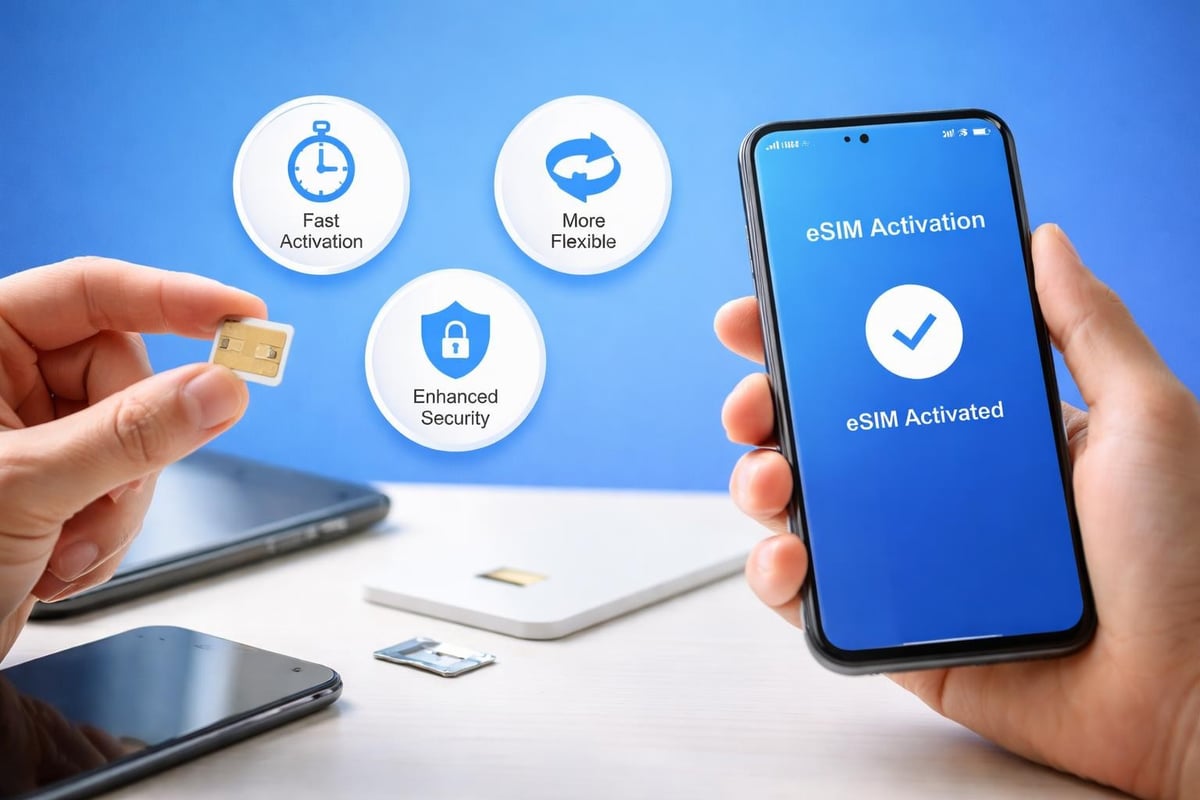
eSIM technology, by contrast, is embedded directly into your iPhone's hardware. It's a digital SIM that can be activated remotely without any physical card. According to Apple Support, eSIM technology offers several compelling benefits:
- Instant activation without waiting for postal delivery
- Support for multiple phone numbers on one device
- Easier switching between carriers
- No risk of losing or damaging a physical card
The iPhone 14 and later models sold in the United States exclusively use eSIM, eliminating the physical SIM tray entirely. Other regions still support dual SIM functionality, combining one physical SIM with eSIM capabilities.
How to Activate iPhone SIM with a Physical Card
If you're using a traditional physical SIM card, the activation process is straightforward but requires attention to detail.
Preparing Your Physical SIM Card
Before you begin, ensure you have:
- Your new or existing SIM card from your carrier
- The SIM ejector tool (or a small paperclip)
- Your iPhone powered off
- Account credentials from your mobile carrier
Locate the SIM tray on your iPhone's side. On most models, it's on the right edge, though older iPhones positioned it differently. Insert the ejector tool into the small hole next to the tray and press gently until the tray pops out.
Installing and Activating Your Physical SIM
Place the SIM card in the tray, ensuring the gold contacts face downward and the notched corner aligns correctly. The card should sit flush within the tray. Slide the tray back into your iPhone until it clicks securely.
Power on your iPhone and follow the on-screen setup assistant. If you're activating a new device, you'll see "Hello" in multiple languages. For existing devices, navigate to Settings > Cellular to manage your SIM activation.
Your carrier will typically activate the SIM automatically within minutes. You'll see signal bars appear in the status bar when activation succeeds. If activation doesn't occur automatically, you may need to contact your carrier's support team.
| Activation Method | Time Required | Technical Difficulty | Equipment Needed |
|---|---|---|---|
| Physical SIM | 5-15 minutes | Easy | SIM ejector tool |
| QR Code eSIM | 2-5 minutes | Very Easy | QR code from carrier |
| Carrier App eSIM | 3-7 minutes | Easy | Internet connection |
| Manual eSIM Entry | 5-10 minutes | Moderate | Activation details |
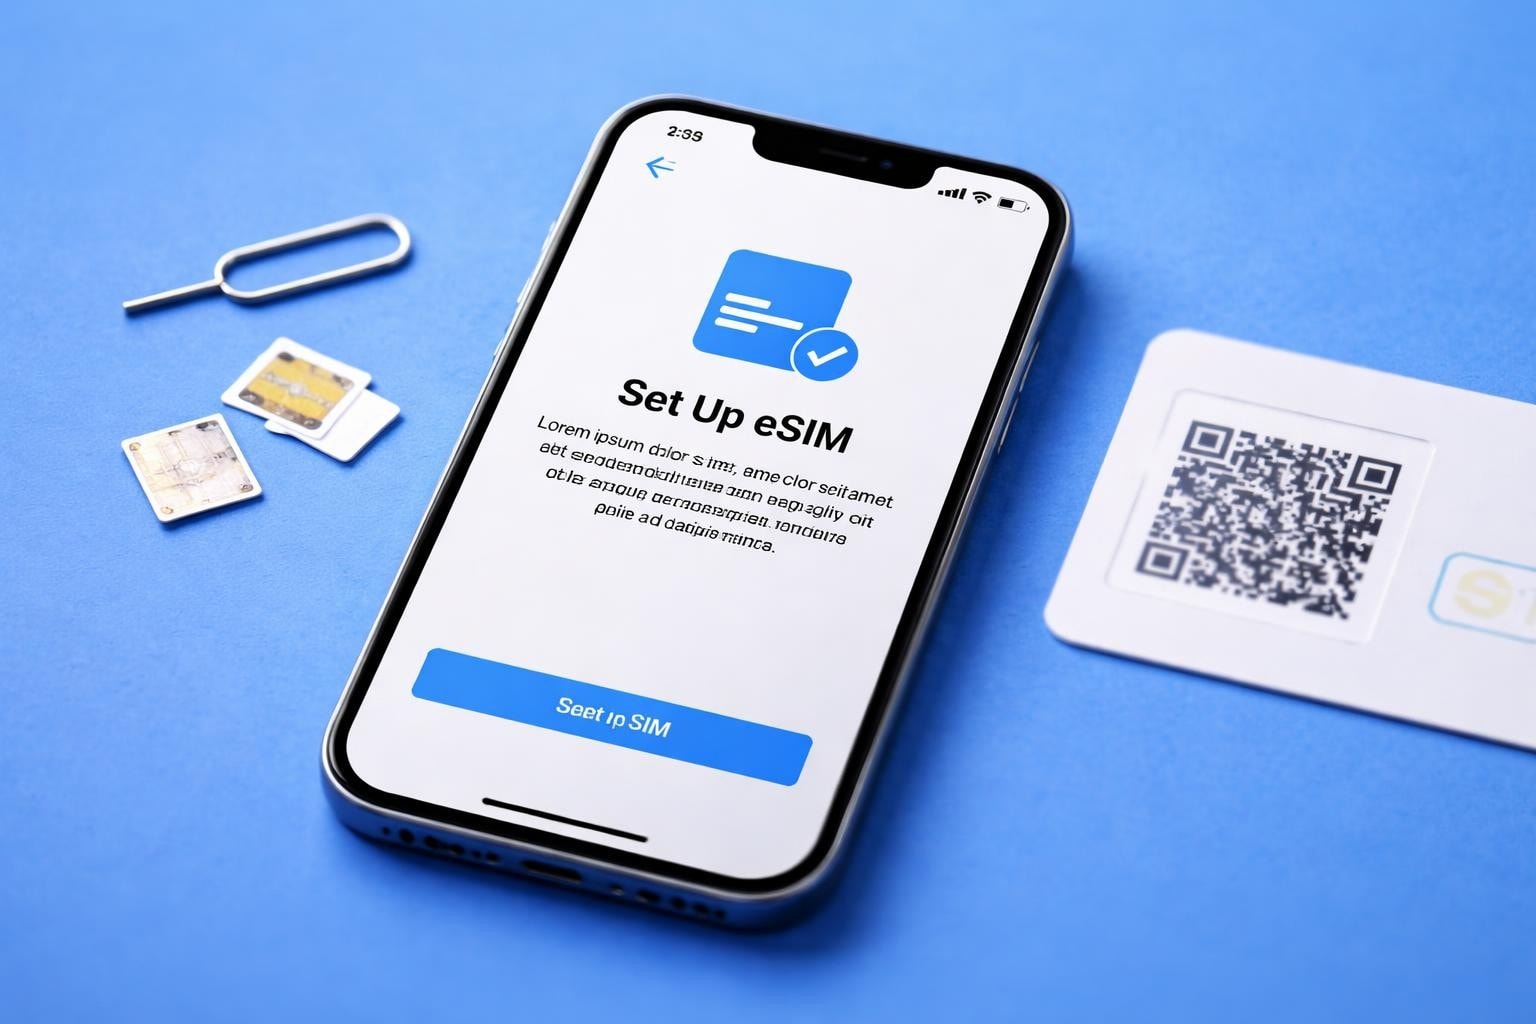
Activating Your iPhone with eSIM Technology
The process to activate iPhone SIM using eSIM technology is remarkably simple and increasingly popular among travellers and those who value flexibility.
Quick Setup with QR Code Activation
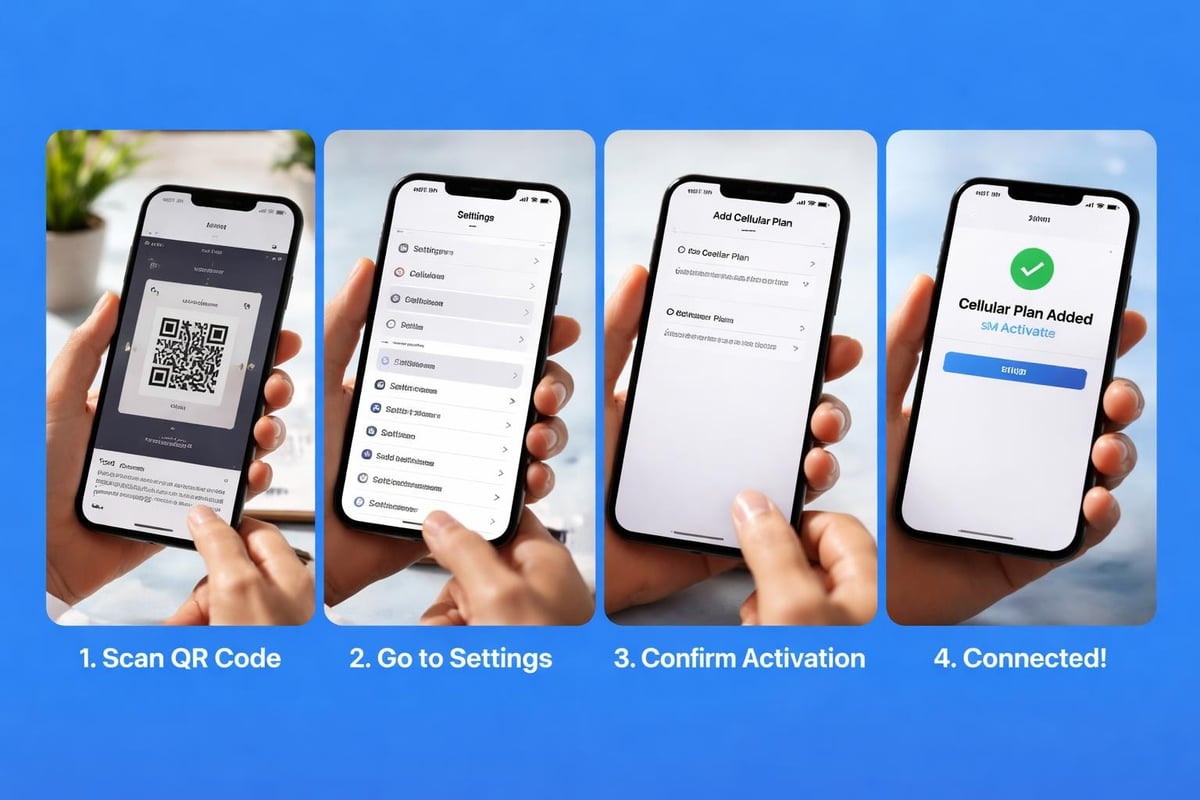
This is the most common method for eSIM activation. Your carrier provides a QR code either by email, through their app, or on a physical card.
Navigate to Settings > Cellular > Add Cellular Plan on your iPhone. Point your camera at the QR code, and your iPhone will automatically detect and read it. Within seconds, you'll see a prompt to add the cellular plan.
Tom's Guide's eSIM activation tutorial explains this process visually, making it easy for first-time users. The entire activation takes just minutes, and you'll receive confirmation once your eSIM is active and ready to use.
Carrier App Method
Many modern mobile operators offer apps that streamline the eSIM activation process. Simply download your carrier's official app, log into your account, and select the option to activate your eSIM.
The app handles all technical details automatically, transferring your eSIM profile directly to your iPhone without requiring QR codes or manual data entry. This method is particularly convenient when you're already a customer upgrading to a new device.
Manual eSIM Configuration
For situations where QR codes aren't available, you can manually enter your eSIM details. Your carrier will provide:
- SM-DP+ Address
- Activation Code
- Confirmation Code (if required)
Go to Settings > Cellular > Add Cellular Plan > Enter Details Manually and input the information exactly as provided. This method requires careful typing, as errors will prevent successful activation.
Activating iPhone SIM During Initial Setup
Setting up a brand-new iPhone presents the perfect opportunity to activate your SIM from the start. The setup assistant guides you through each step seamlessly.
First-Time Activation Process
When you power on your new iPhone, the setup assistant appears immediately. After selecting your language and region, you'll connect to Wi-Fi. This internet connection is crucial for eSIM activation, though physical SIMs don't require it.
As detailed in Tom's Guide's iPhone setup walkthrough, the setup process includes a "Set Up Cellular" screen. Here you can:
- Transfer your number from your old iPhone
- Activate a new plan with a QR code
- Set up later and activate manually
Transferring from Another iPhone
If you're upgrading from an older iPhone, the transfer process is remarkably smooth. When both devices are nearby and connected to Wi-Fi, your new iPhone detects the old one automatically.
Select "Transfer from iPhone" and follow the prompts. Your eSIM profile transfers directly without needing QR codes or carrier intervention. This feature works brilliantly for existing customers who want to activate iPhone SIM on their new device quickly.
The transfer includes your phone number, carrier plan, and all associated settings. Within minutes, your new iPhone is fully activated and ready to use.
Troubleshooting Common Activation Issues
Even with modern technology, you might occasionally encounter problems when trying to activate iPhone SIM. Understanding these issues helps you resolve them quickly.
"SIM Not Supported" Error Messages
This error typically indicates one of three problems:
- Your iPhone is carrier-locked to a different network
- The SIM card isn't compatible with your iPhone model
- The SIM hasn't been activated by your carrier
Contact your carrier to verify the SIM's status and confirm your iPhone is unlocked for use on their network. You can also check your device's compatibility by reviewing the compatible devices list to ensure your iPhone model supports the SIM type you're attempting to activate.
Activation Timeout Problems
Sometimes activation simply takes longer than expected. Network congestion, carrier system maintenance, or technical glitches can delay the process.
If activation hasn't completed after 15 minutes:
- Restart your iPhone
- Toggle Airplane Mode on and off
- Remove and reinsert your physical SIM (if applicable)
- Reset Network Settings (Settings > General > Transfer or Reset iPhone > Reset > Reset Network Settings)
iMessage and FaceTime Activation Failures
After successfully activating your SIM, you might find iMessage or FaceTime won't activate. This frustrating issue is surprisingly common. Tom's Guide's iMessage troubleshooting article provides specific solutions for iOS 26 users experiencing delivery problems.
The most effective fix involves:
- Going to Settings > Messages
- Toggling iMessage off, waiting 30 seconds, then on again
- Signing out of your Apple ID and signing back in
- Ensuring your phone number appears under "Send & Receive"
Managing Multiple SIMs and Dual SIM Functionality
Modern iPhones support dual SIM capabilities, allowing you to activate iPhone SIM for both personal and business use simultaneously or maintain connectivity in multiple countries.
Setting Up Dual SIM on Your iPhone
iPhone models from the XS onwards support either:
- One physical SIM plus one eSIM
- Two eSIMs (iPhone 13 and later)
- eSIM only (iPhone 14 and later, US models)
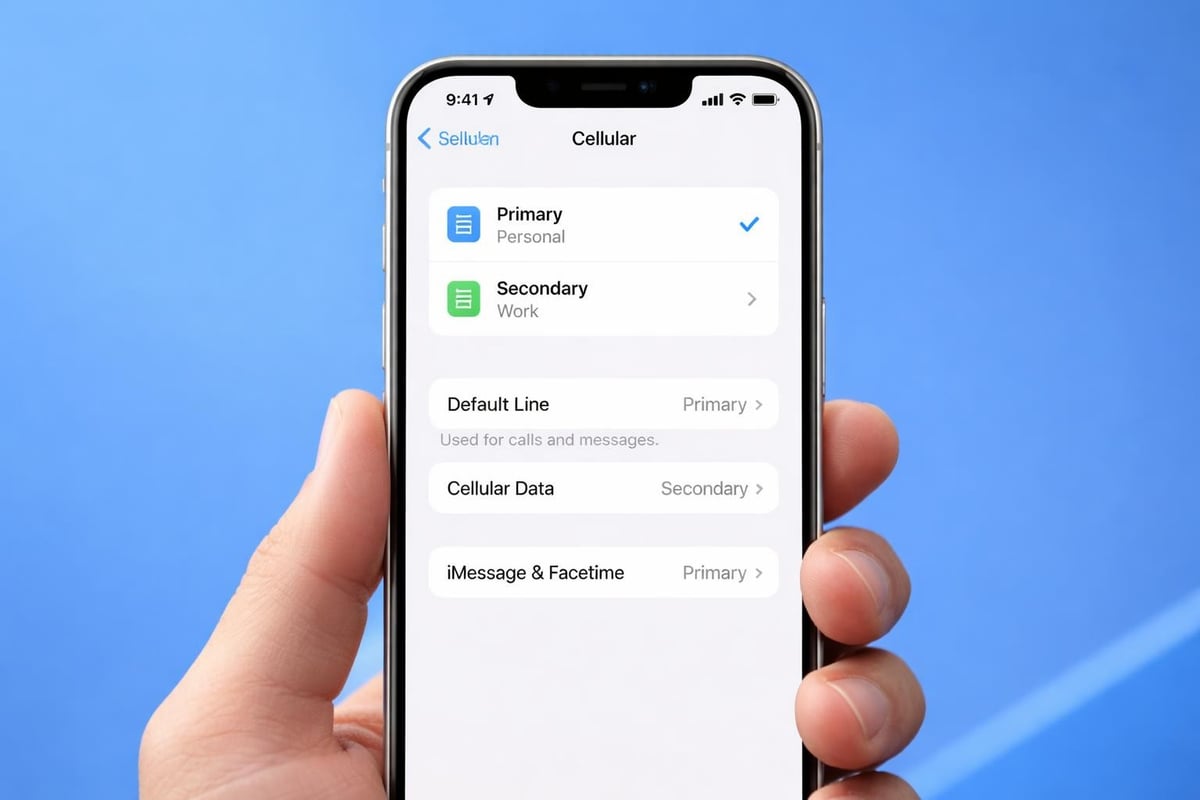
To add a second line, navigate to Settings > Cellular > Add Cellular Plan. You can activate multiple eSIM profiles and switch between them as needed, though only two lines can be active simultaneously.
Each line can have distinct settings for cellular data, calls, and messages. Label them clearly (like "Personal" and "Work") to avoid confusion when making calls or sending texts.
Practical Dual SIM Scenarios
Dual SIM functionality proves invaluable for:
- International travellers maintaining their home number whilst using local data
- Business professionals separating work and personal communications
- People living in border regions who need coverage in multiple countries
- Anyone seeking better coverage by using two different networks
For travellers specifically, using an eSIM for international coverage whilst keeping your primary number active for important calls creates the perfect balance of connectivity and affordability.
eSIM Activation for International Travel
Activating an eSIM before international travel eliminates roaming fees and provides instant connectivity upon arrival. This approach has transformed how frequent travellers stay connected globally.
Pre-Trip eSIM Installation
The beauty of eSIM technology is that you can activate iPhone SIM profiles before departure. Purchase your eSIM plan, receive the QR code, and install the profile whilst still at home.
The eSIM remains dormant until you arrive in the destination country and enable it. This preparation means you'll have internet connectivity the moment you land, perfect for accessing maps, booking transportation, or contacting accommodation.
Many travellers maintain their primary SIM for receiving calls and texts whilst using an eSIM exclusively for data. This configuration avoids roaming charges whilst ensuring you don't miss important communications.
Regional and Country-Specific eSIM Plans
Different destinations require different approaches. As explained in Apple's eSIM setup guide, compatibility varies by region and carrier.
Europe typically offers regional eSIM plans covering multiple countries, ideal for multi-destination trips. Single-country destinations like Japan, Thailand, or Australia often provide better value through country-specific plans with generous data allowances.
Before activating, verify:
- Your iPhone model supports eSIM (iPhone XS and later)
- The eSIM provider covers your destination countries
- Data allowances match your expected usage
- The activation period aligns with your travel dates
Switching Between Carriers with eSIM
One of eSIM's greatest advantages is the ability to switch carriers without visiting shops or waiting for physical cards. The process to activate iPhone SIM from a new provider is entirely digital.
Removing Old eSIM Profiles
Before adding a new carrier's eSIM, you may want to remove old profiles. Navigate to Settings > Cellular and tap on the plan you wish to remove. Select "Remove Cellular Plan" and confirm your choice.
Your iPhone stores removed eSIM profiles temporarily, allowing you to reinstall them without obtaining new QR codes. This feature proves useful when temporarily switching between carriers or testing different providers.
Activating a New Carrier's eSIM
Different carriers have varying processes, but the fundamentals remain consistent. Most provide activation through:
- QR codes sent via email
- In-app activation through their dedicated application
- Manual entry of activation credentials
The installation guide offers detailed instructions for various scenarios, ensuring smooth activation regardless of your carrier's specific requirements.
Major carriers have streamlined their eSIM onboarding considerably since 2024, with most activations completing in under five minutes.
Activating iPhone Without a Physical SIM
Can you activate and use an iPhone without any SIM card at all? Absolutely, though with some limitations.
Wi-Fi Only Activation
As Macworld explains, you can activate an iPhone using only Wi-Fi. During setup, when prompted about cellular service, select "Set Up Later" or "Don't Transfer."
Your iPhone will activate with limited functionality:
- Full access to Wi-Fi internet connectivity
- iMessage and FaceTime using your Apple ID
- All apps and services that don't require cellular
- Emergency calls (in supported regions)
This approach suits iPads being used as secondary devices, children's devices where you want to limit connectivity, or situations where you're waiting for your SIM to arrive.
Using eSIM for Full Functionality
For complete iPhone functionality without physical SIMs, eSIM provides the perfect solution. You can activate iPhone SIM digitally and enjoy all features without ever handling a physical card.
This is particularly relevant for the iPhone 14 and later US models, which completely eliminated the physical SIM tray. These devices rely exclusively on eSIM technology for cellular connectivity.
Post-Activation Configuration and Optimisation
After successfully activating your SIM, several settings deserve attention to ensure optimal performance and cost management.
Cellular Data Settings
Navigate to Settings > Cellular > Cellular Data Options to configure:
- Data Roaming: Disable this unless using international eSIM plans
- Low Data Mode: Reduces background data consumption
- Voice & Data: Choose between 5G, 4G, or 3G networks
For dual SIM setups, specify which line handles cellular data. You can also set different lines for calls and data, maximising flexibility and minimising costs.
App-Specific Data Usage
Control which apps can use cellular data by scrolling down in Settings > Cellular. Toggle individual apps on or off based on your preferences.
Background App Refresh consumes significant data if left unchecked. Limit it to Wi-Fi only or disable it entirely for apps that don't require constant updates.
Network Selection and Carrier Settings
Your iPhone automatically selects the best available network, but manual selection sometimes improves performance. Go to Settings > Cellular > Network Selection and disable automatic selection to see available networks.
Occasionally, carrier settings updates become available. These updates improve connectivity and add features. You'll receive notifications when updates are available, or check manually in Settings > General > About.
Security Considerations When Activating iPhone SIM
Protecting your cellular connection from unauthorised access and fraud matters increasingly in 2026's connected world.
eSIM Profile Security
Unlike physical SIMs that can be removed and inserted into other devices, eSIM profiles are locked to your specific iPhone. This provides inherent security against SIM swap fraud, where criminals transfer your number to their device.
Enable two-factor authentication on your carrier account to prevent unauthorised eSIM installations. Reputable providers require identity verification before issuing eSIM QR codes or activation details.
Protecting Your Activation Information
QR codes and activation credentials should be treated like passwords. Never share them publicly or with untrusted parties. Once you've successfully activated your eSIM, delete activation emails and screenshots containing QR codes.
If you suspect your eSIM profile has been compromised, contact your carrier immediately to deactivate it and issue a replacement.
Carrier-Specific Activation Procedures
Whilst the general process to activate iPhone SIM remains consistent, individual carriers sometimes have unique requirements or streamlined procedures.
Major Network Operators
Large carriers typically offer multiple activation methods, including retail store assistance, automated phone systems, and comprehensive mobile apps. Their infrastructure usually handles activation quickly and reliably.
Premium carriers often include white-glove activation services, where support staff remotely access your device (with permission) and complete the entire setup process for you.
Mobile Virtual Network Operators (MVNOs)
Smaller carriers and MVNOs may have simpler processes but occasionally less polished activation systems. They rely heavily on email-based QR code distribution and self-service portals.
Research your specific carrier's activation process before purchasing to avoid surprises. Check whether they support the latest iOS features and eSIM capabilities for your iPhone model.
Successfully activating your iPhone SIM, whether physical or digital, unlocks your device's full potential and keeps you connected wherever life takes you. Understanding the various activation methods, troubleshooting common issues, and optimising your settings ensures seamless connectivity from the moment you power on your device. For travellers seeking instant activation without roaming fees across 200+ countries, gosimless.app delivers affordable eSIM plans with secure setup and multi-device support, making global connectivity simpler than ever.
gosimless Team
The gosimless editorial desk — testing eSIMs, carriers and travel connectivity so you don't have to. Updated continuously from the road.